There are desserts that feel like pure magic, and cheesecake is definitely one of them. Creamy, silky, slightly tangy, and sitting on top of a crunchy biscuit crust—it’s that perfect balance of textures that makes every bite so dreamy. And here’s the best part: this version is no-bake. That means no ovens, no complicated techniques, just a handful of ingredients and a little patience while it chills in the fridge.
This no-bake cheesecake is ideal for those moments when you want something impressive without spending all day in the kitchen. A buttery biscuit crust, a mousse-like cream cheese layer, and a fruity topping come together in just 30 minutes of prep. Then your refrigerator does the rest. It’s fuss-free, versatile, and an absolute crowd-pleaser for parties, potlucks, or even just a cozy family dessert night.
Why You’ll Love No-Bake Cheesecake
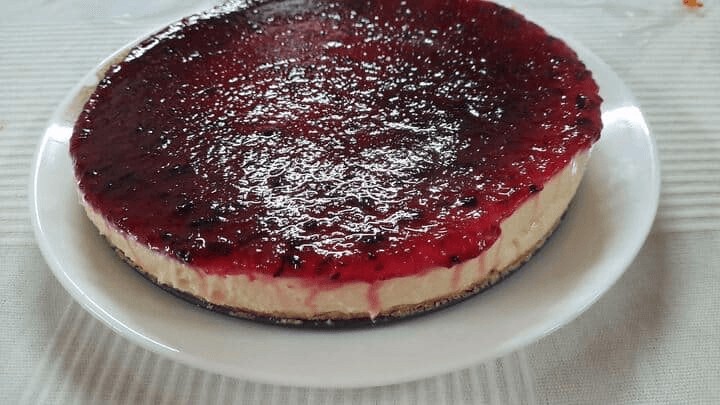
Unlike baked cheesecakes that need water baths, careful baking, and long cooling times, this no-bake version is pure simplicity. It’s light, creamy, and customizable with toppings. I used a glossy blueberry crush for mine, but you can swap in caramel, hot fudge, Nutella, whipped cream, or even a tropical fruit layer. It’s your cheesecake, your rules.
Ingredients
For the Biscuit Crust
- Marie biscuits – 180 g (or any plain biscuit)
- Melted butter – 100 g
For the Cheesecake Layer
- Cream cheese – 200 g
- Powdered sugar – 150 g
- Gelatine – 2 tsp
- Fresh cream – 200 g
- Vanilla essence – 1 tsp
- Lemon juice – 1 tsp
For the Topping
- Blueberry crush – 3 tbsp
Step-by-Step Preparation
Step 1: Make the Crust
Crush the biscuits in a mixer until you have fine crumbs. Mix the crumbs with melted butter until it resembles wet sand. Press the mixture firmly into the base of a springform pan using the back of a spoon or the bottom of a glass. Set aside while you prepare the filling.
Step 2: Prepare the Cheesecake Layer
In a bowl, beat the cream cheese until smooth. Stir in lemon juice and powdered sugar until creamy. Meanwhile, soak the gelatine in water and melt it gently using a double boiler to avoid lumps. Add fresh cream and vanilla essence to the cream cheese mixture and whisk until smooth. Finally, pour in the dissolved gelatine and mix well. Spread this creamy mixture evenly over the crust in your pan. Cover with plastic wrap and refrigerate overnight for best results.
Step 3: Add the Topping
Once the cheesecake has set, take it out of the fridge and spoon the blueberry crush on top. Instead of spreading with a spatula, tilt the pan gently in circles to let the topping flow and coat evenly. Pop it back into the fridge for another 30 minutes to firm up.
Step 4: Slice and Serve
Carefully remove the cheesecake from the pan, cut into neat slices, and serve chilled.
Tips for Success
- Always use room temperature cream cheese for a smoother filling.
- Don’t rush the chilling time—overnight is best for perfect slices.
- If you’re not a fan of gelatine, agar-agar can be used as a vegetarian substitute.
- Play around with toppings—fresh strawberries, mango puree, or even a swirl of Nutella make this dessert extra special.
Final Thoughts
This no-bake cheesecake is the definition of easy elegance. With its crunchy base, creamy filling, and customizable toppings, it’s a dessert that works for every occasion. It’s quick to prepare, impossible to resist, and guaranteed to impress your family and guests. So go ahead, whip one up, and enjoy the kind of dessert that makes ordinary days feel a little more celebratory.